WooCommerce Garanti BBVA Payment Module Integration
WooCommerce is a popular open-source platform for e-commerce websites. By integrating the Garanti BBVA payment module, you can offer your customers a secure and seamless payment experience. Below is a step-by-step guide to help you install and configure the Garanti BBVA module.
INSTALLING THE PLUGIN
Installation via WordPress Marketplace
- Log in to your WordPress admin panel.
- From the left-hand menu, navigate to Plugins > Add New.
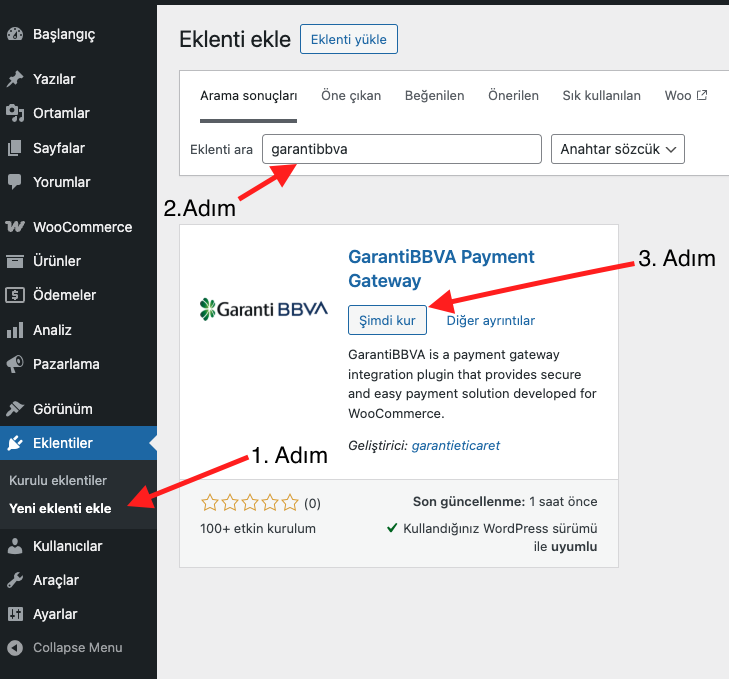
- In the search bar, type garantibbva.
- Locate the GarantiBBVA plugin in the search results and click Install Now.
- Once the installation is complete, click the Activate button.
CONFIGURING THE SETTINGS
- From the admin panel, go to WooCommerce > Settings.
- Click on the Payments tab.
- Locate the GarantiBBVA module and click on Set up or Manage.
- Ensure the Enable/Disable GarantiBBVA payment method option is selected. If not, enable it and click Save changes.
- Click the Click here to access GarantiBBVA Panel button to be redirected to the configuration page. Alternatively, you can access the same page via the WooCommerce > GarantiBBVA menu item on the left panel.
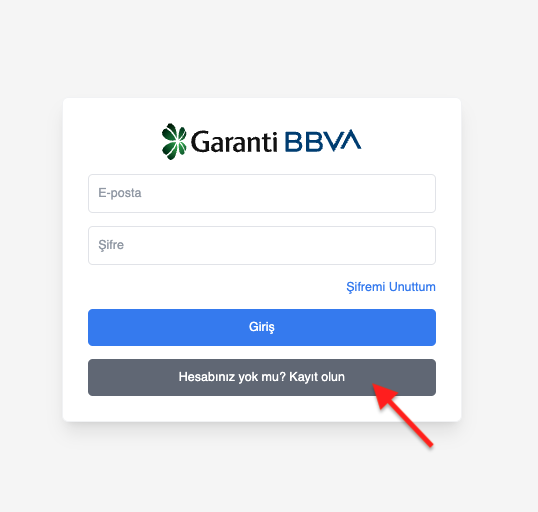
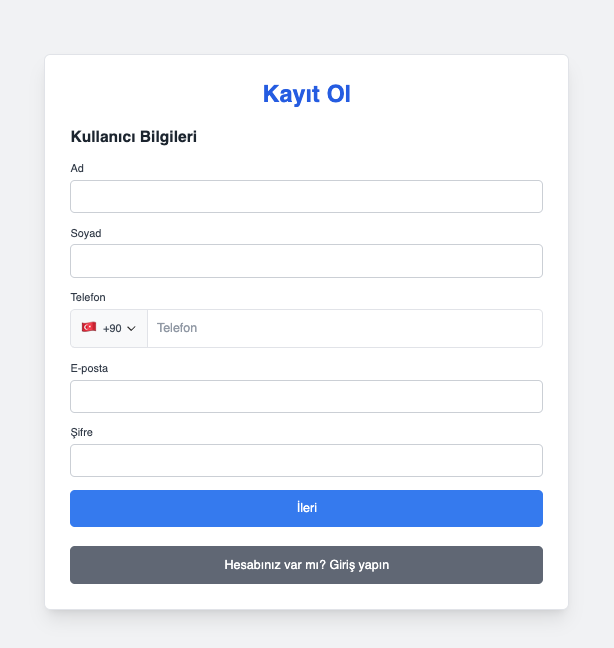
- To use the module, click on the Sign Up button in the module interface and fill in the required information to create an account.
- Enter the user credentials you created and click Log In.
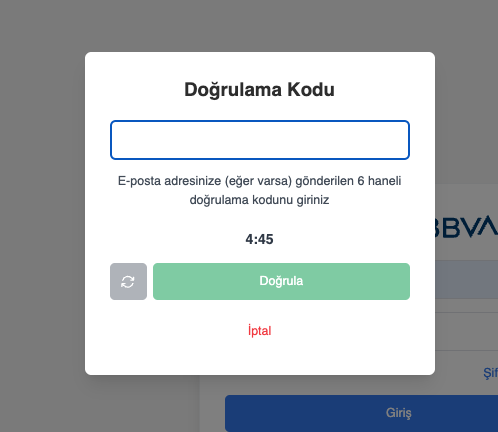
- Enter the verification code sent to your email address.
- Click the Verify button
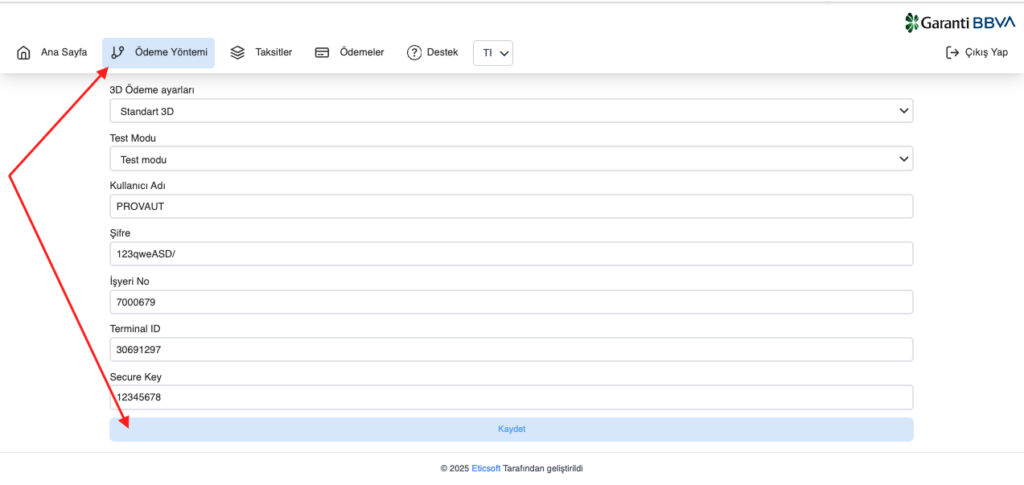
- In the opened interface, navigate to the Payment Method tab.
- Enter the credentials provided by Garanti BBVA.
- After entering the configuration details, click the Save button.
We recommend creating a test order to ensure the GarantiBBVA payment flow is functioning correctly.
TESTING
- Click on the Payment Method (GATEWAY) button.
- Under the Test Mode section, select Test Mode and click Save.
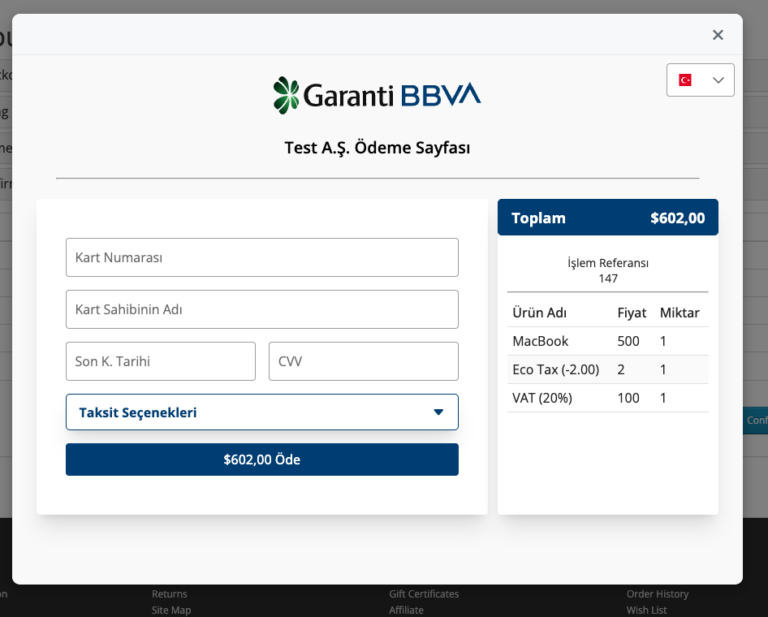
- Add a product to your cart and proceed to checkout. Select Pay with GarantiBBVA as your payment option.
- In the pop-up payment window, enter the test card details and complete the payment.
If you encounter any issues during these steps, click the SUPPORT button to contact the support team.